Take your Snap Lens to the next level with AI.
SnapML is a tool that enables you to integrate machine learning models into your Lens Studio projects. Here's a step-by-step guide on how to export your trained model and import it into Lens Studio using SnapML.
Step 1: Exporting your model to Lens Studio
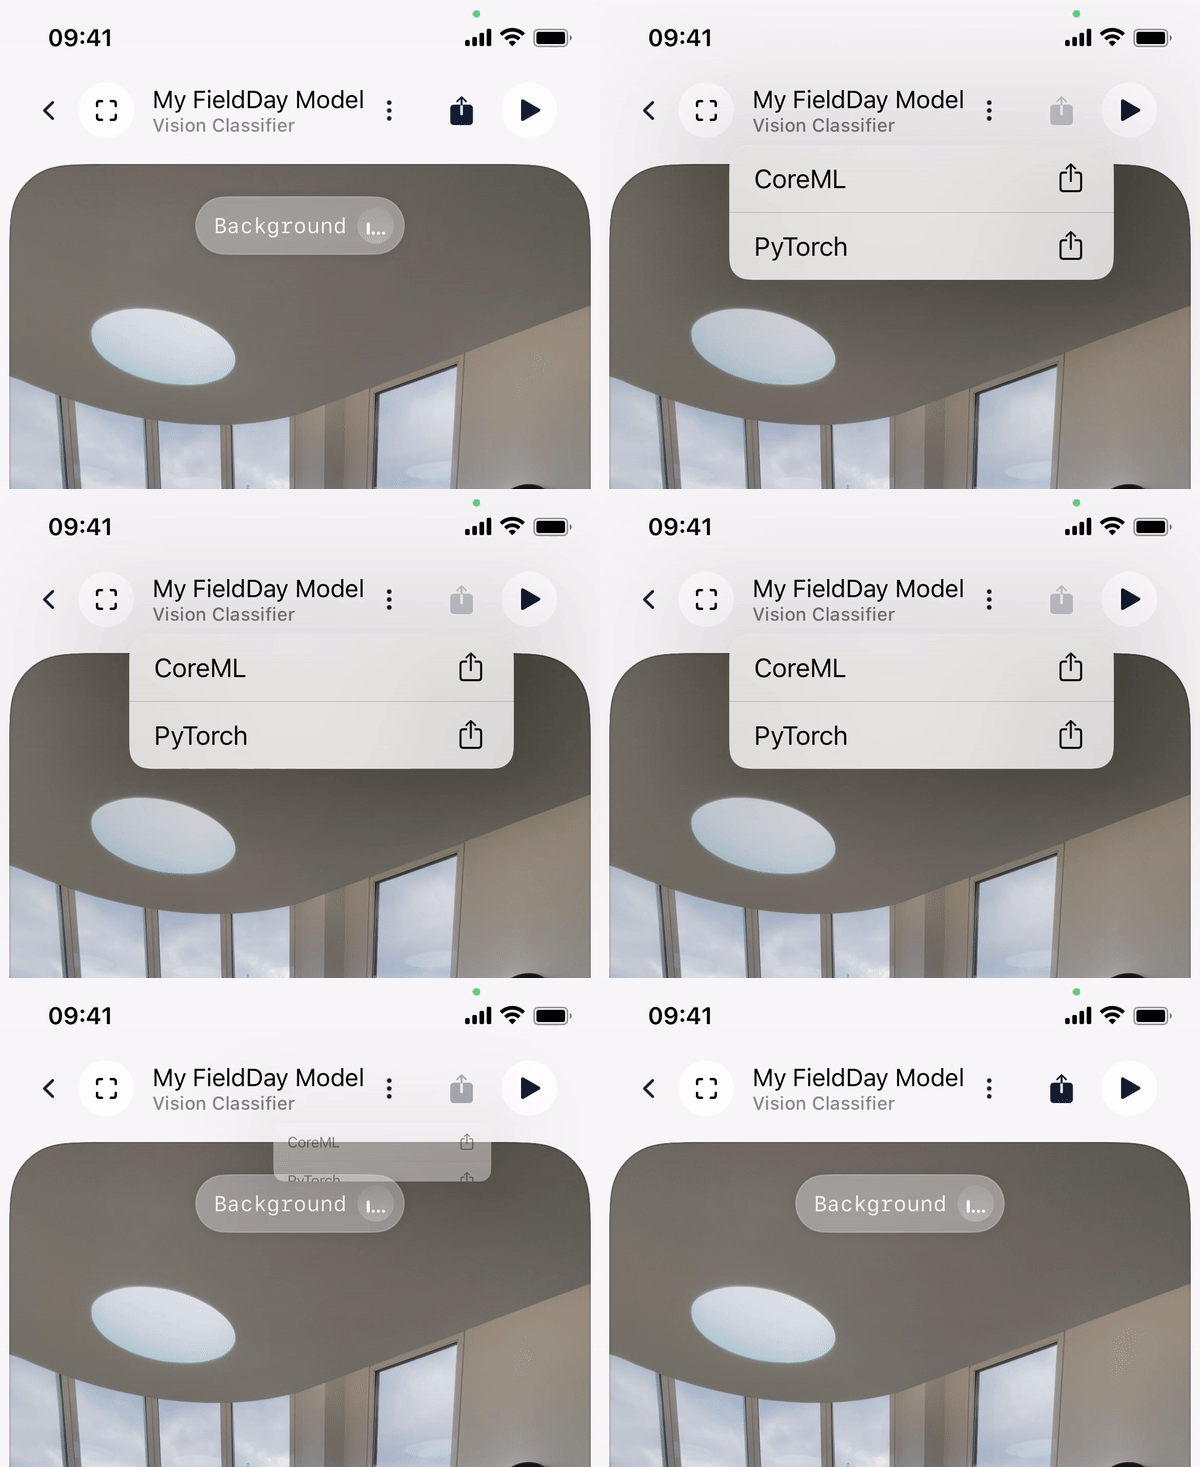
Once your model is trained, you can easily export it for Lens Studio using FieldDay.
The following files will be created:
An .ONNX file
A Lens Studio template
A script with all your labels

Step 2: Importing your model into Lens Studio
To import your model into Lens Studio, follow these steps:
Open the Lens Studio template file that you generated, or go to Lens Studio and open FieldDay's Classification Template.
With the project open, drag the .ONNX file and the label script file into your project resources.
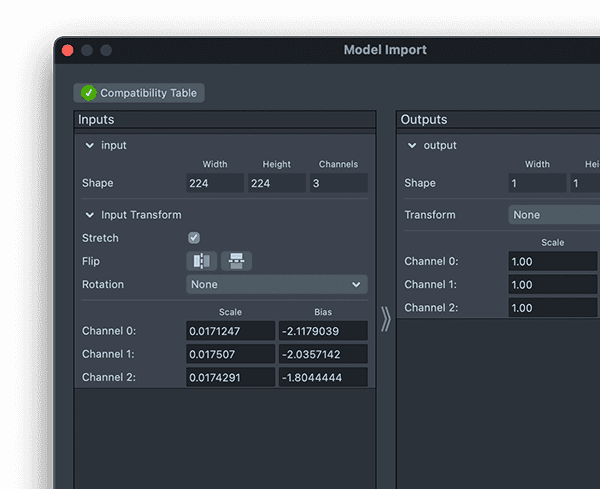
In the ML Component setup popup, set up your scale and bias parameters using the following values for all FieldDay models:

Scale: [0.017124753831663668, 0.01750700280112045, 0.017429193899782133]
Bias: [-2.1179039301310043, -2.0357142857142856, -1.8044444444444445]
Step 3: Link your ML Component
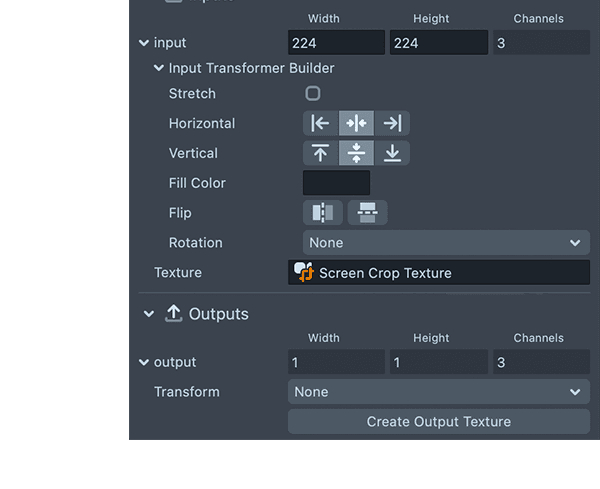
In your Objects panel, select your ML component. This will open the Inspector panel, where you can select your model. Un-check "stretch" and select "Screen Crop texture" as the texture to input the camera feed to your model.

Step 4: Update the Label Script with your model's labels
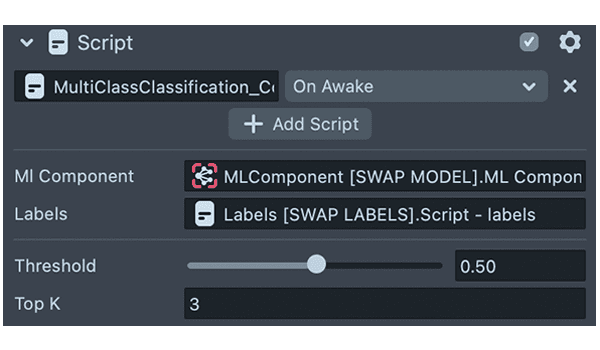
In your Objects panel, select the Labels script that lives under the Multi Class Classification object. In its inspector panel, slide the labels script you exported from FieldDay or click on the current label script to replace it with the new one.
Step 5: Adjust Top K & Threshold.

Adjust the Top K in the Inspector panel of the "Multi Class Classification" object to a number that is inferior or equal to the number of categories you have in your FieldDay model, including Background.
You're all set! You can use the toggle to display or hide the live analysis view to debug and start adding effects to each label.

